How To Measure for your Aqua Step if you have an Add-On Platform with Open Slots
This platform has been added on, it is normally attached to the transom with mounting braces. There are three brackets that you will be mounting through your platform. Two will be placed at the most outer edge of your platform and one in the center. Simply follow the instructions to help you know what size of Aqua Step you will want.
#1
#2
Step 1:
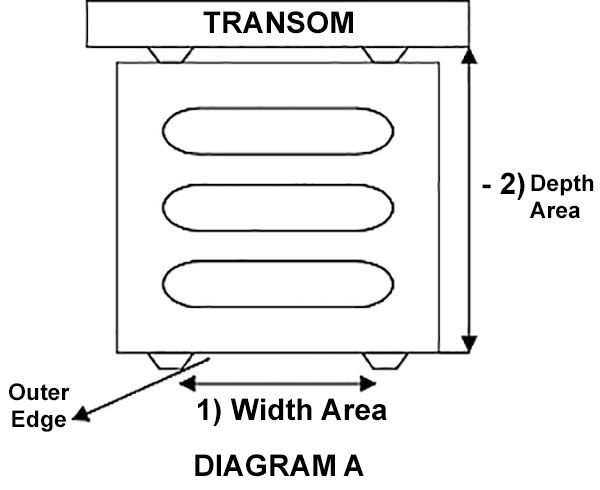
To know how much width area you have for your step, measure underneath your platform between the mounting braces. (See diagram A and pic #1). If you have an exhaust in between the mounting braces you might need to deduct this from your available width space. You can draw in your exhaust in diagram A above, please include how much width space it takes up from the mounting brace.
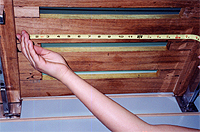
To know the depth of your platform, begin at the outer edge and measure all the way to the back of your transom (See diagram A & pic #2.)
Note: If your platform is not flat underneath (some have a lip or recession) please draw that in diagram B, also include the flat area depth measurement you have all the way back to the transom.
Step 2:
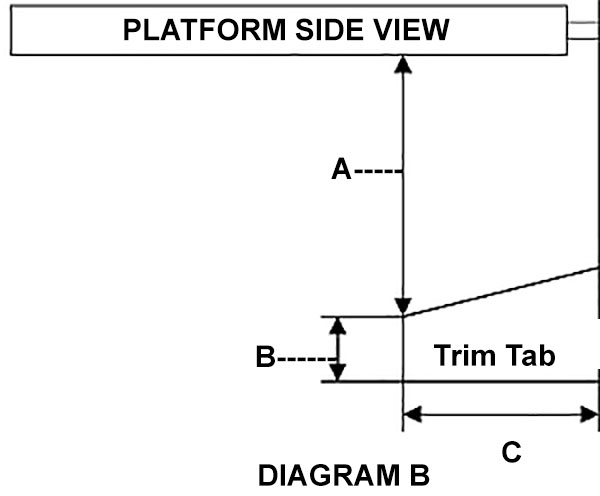
Use diagram B if you have an exhaust and/or trim tabs underneath your platform and if they are in the same area where you would be mounting your aqua step. Draw your exhaust in and include A, B, and C: A) How far down they are from the platform. B) Write the width of the trimtab C) Write how far the exhaust pipe and/or trim tab comes out from the transom.
Aqua Performance has modified the mounting bracket to fit most platforms. Because it is impossible to know all the dimensions of the Fiberglass or Teak platforms out on the market you can use the template provided or write in your platform specifications and our technicians will be happy to help you. If you don’t need assistance compare your platform measurements with the size chart for the 1063TL aqua boat step and call (800) 538-6729 for prompt assistance.
Step 3:
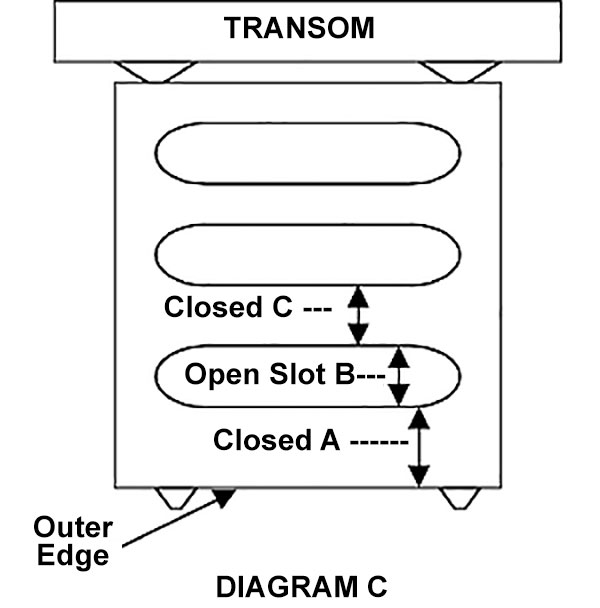
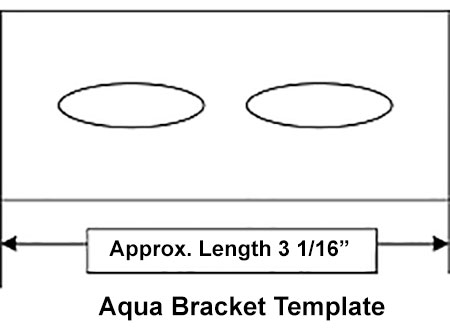
Measure the space between each arrow as shown for A, B & C (diagram C) or use the template of the bracket to ensure a proper application
If you chose to use the template, cut it out and place it at the outer most edge of your platform, make sure to place it underneath your platform.
First, make sure that the bracket lines up with the solid sections of your platform as to where you will be drilling.
If you need a longer bracket you can use the template provided to draw the added length you need, you will need to mark where you will need the extra hole to be drilled. The new holes will not be oblong. Once we receive your bracket drawing we will use it as a template to weld a stainless steel metal plate to your bracket per your specifications and drill the new holes for you, therefore it is very important that you be accurate in your dimensions and new hole location.
When complete please fax your drawing to (951) 340-2056 or mail to Tech Support, P.O. Box 370 • Corona, CA 92878-0370 Include your name and daytime phone number. Our technician will call you upon receiving your drawing.